Scene Luminance in a nutshell
Scroll down for a more detailled description.
What is Scene Luminance?
For those of you who don’t want to get a doctor in photography, but rather want to quickly learn photography: all you need to know is that the scene luminance describes how bright the scene is that you want to photograph.
Since photography is all about light – remember, it’s Greek and means “the light paints” – scene luminance is the most important component of image brightness.
Exposure Values
In photography scene luminance is basically measured in exposure values or EV. The light of a candle is basically set as the baseline with 0EV. If the available light is darker than that of a candle, it gets a negative value, if it is brighter than that, it gets a positive value. Think of it similar as the Celsius temperature scale.
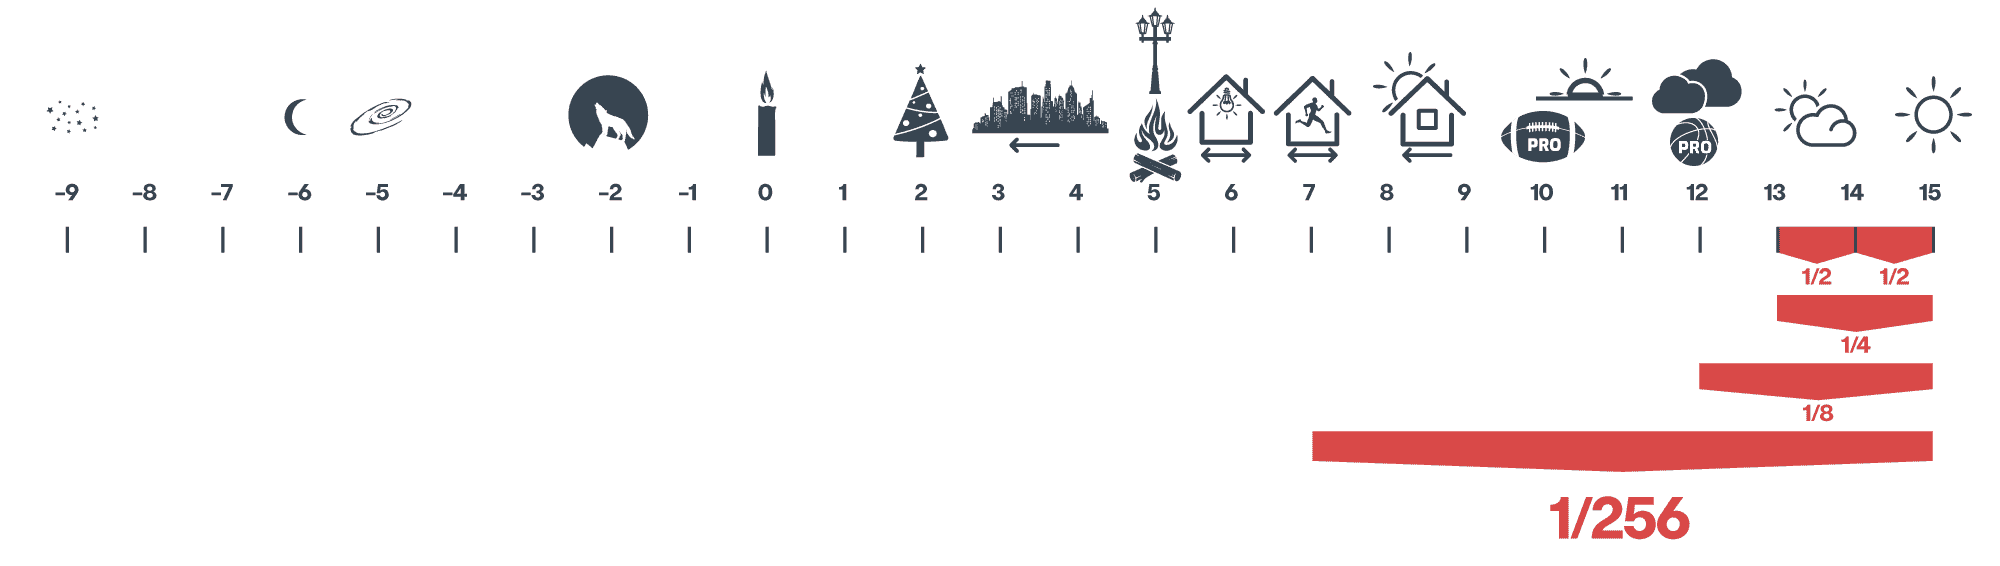
Here is a graphical representation of certain exposure values for scenes with different brightness.
What is important to understand is, that one exposure value will double the scene brightness and therefore also double image brightness if you don’t compensate with any camera settings.
- 1EV is twice as bright as 0EV
- 2EV will already quadruple the brightness compared to 0EV
- 3EV will octuplicate the brightness (what a word!🤣)
Available Light Scenarios
Looking at the graph above, you already understand that a scene gets darker really quick without you even realizing.
For example when you are out in the sun and go indoors into a very well lit professional NBA sports arena, you might not even realize the difference. The truth is however, that the scene is already 8x darker than outdoors.
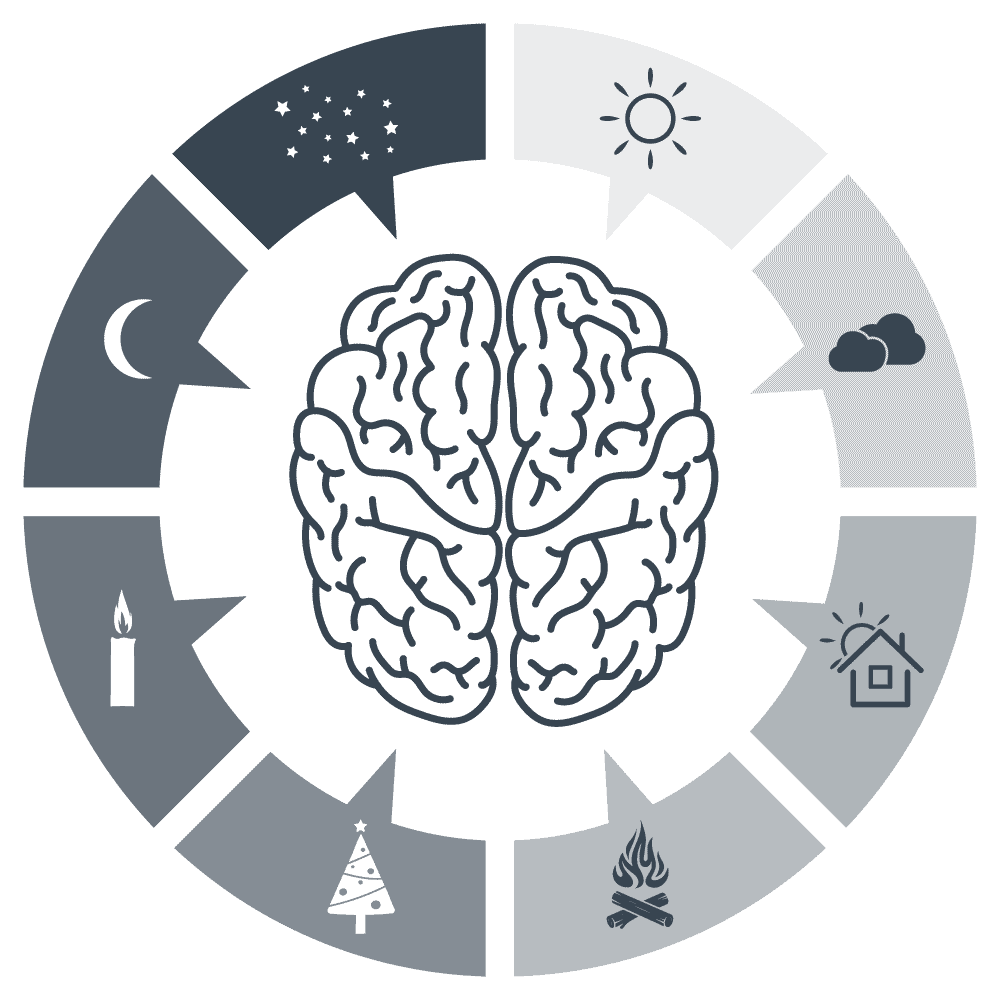
Our Brain - the Image Editor
The reason why we don’t realize is, that our brain together with our eyes permanently tries to provide a constantly bright scene – otherwise we would not be able to see in the dark.
The Truth is Different
The truth is: you quickly lose a lot of scene luminance, when you compare a very well lit daylight scene to less than perfect scenarios. Below I will name a few examples.
1. Slightly cloudy with sun hiding behind clouds
Let’s start from the right side, a scene lit by the sun at noon has 15EV.
If the sun hides behind light clouds, you already lose one EV, so you end up with half the light.

2. Overcast sky outdoors
In a scene outdoors with an overcast sky at noon, you will already get down to 12EV.

In a scene outdoors with an overcast sky at noon, you will already get down to 12EV.
Let's calculate
- 14EV is half as bright as 15EV
- 13EV is half as bright as 14EV (1/2 of 1/2 is 1/4)
- 12EV is half as bright as 13EV (so 1/2 of 1/4)
The result is 1/8
3. Indoor gyms (e.g. kids basketball)
If you continue that to EV7, which is the brightness level of most gyms where your kids play basketball, you will be at 1/256.
So outdoor in the bright sunlight, you have 256 times more light available, than in your kids gym.
4. Night scene lit by stars only

That loss of light creates massive problems in photography. Continue reading and you will suddenly start to understand exposure.
"Stops" in Photography
Before we continue with the camera settings that help us control scene luminance to get a correct exposure,
let me quickly tell you that photographers usually talk about “stops“, rather than EV, but basically, that’s the same.
One EV is one stop.
So if someone says: “expose your image one stop brighter” he suggests to make it twice as bright. And making your image one stop darker means exposing it half as bright.
That doubling and halving of brightness is fundamental in photography.
See the Light!
And one final thought about scene luminance before you dabble into the camera settings: start to examine the light in the scene you want to photograph.
For example professional photographers plan their shoots according to the direction of the sun. There are times of the day, nobody could shoot a great image of a certain landscape because you are shooting against the sun and are basically photographing the shadows. But as I said before: photography is all about light.
That does change with the kind of subject you want to photograph though: for portraits, you are usually not that happy when the sun directly hits the face of your subject. Reason being is that it creates hard shadows.
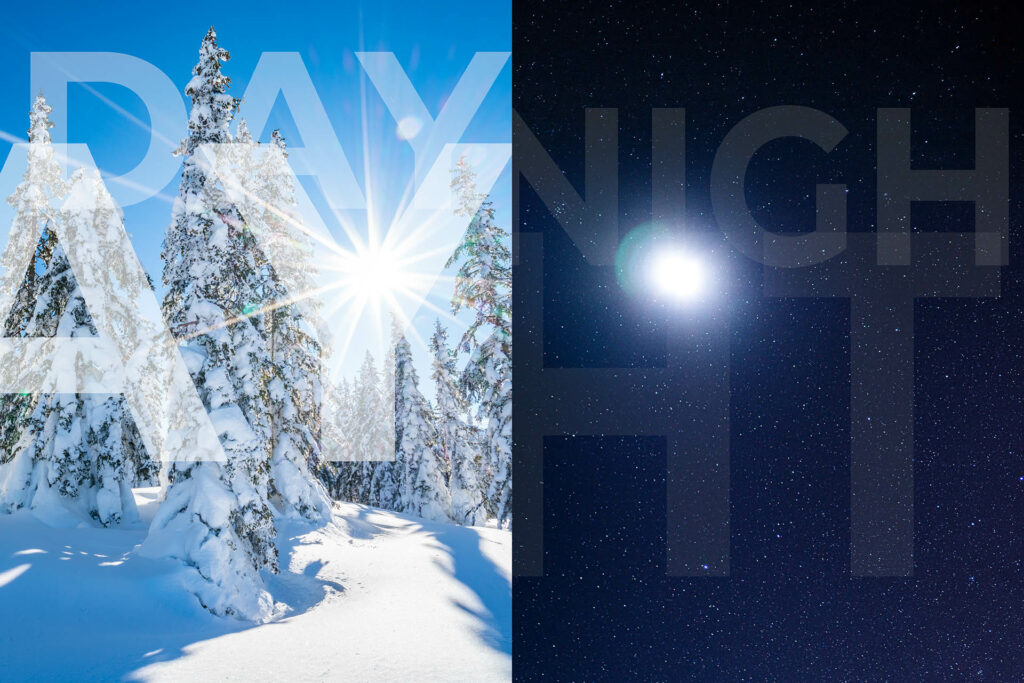
Just to water your mouth: these landscape shots below were taken from the same spot at the very same time. The left is facing south with the sun slightly in the back, the right is facing north shooting against the sun. More on that topic, a little later on this page.


If you are a beginner, click the button to continue to aperture. If you are an advanced photographer and/or want to know more about scene luminance, continue reading below
SCENE LUMINANCE IN DETAIL
Can you change Scene Luminance?
Yes, yes and YES!!!
Shoot in a Brighter Environment
Particularly beginners who are often mislead by the exposure triangle, forget that image brightness is first and foremost about light and therefore scene luminance. Whenever you can, go outdoors to photograph your dogs, rather than shoot them indoors. Same with your kids, family,…
Another option would be to get closer to a window – you wouldn’t believe how much more light you’d get if you reduce the distance to your light source (which indoor is often the window).
Unless you really need to shoot an image in bad lighting conditions, why not plan your shots and shoot in good lighting conditions with higher scene luminance instead?
Add Light by Using a Flash or Simply Turning on the Room Lights
Especially when you are indoors, you can easily increase the scene luminance by using a flash. I will later show you how to best use flash to make your images still look natural, but for now just keep in mind, that you can easily change scene brightness by adding light in general.
Reducing the Light
Believe it or not here are situations when you want to reduce the light in your scene. You can close the blinds of your windows or use so-called scrims to block the light from hitting your subject.
Another option to reduce the light is using ND filters. They are basically sunglasses for your camera. So strictly speaking they don’t really change the brightness of the scene. But they change how much of that brightness will enter your camera.
Definition of Luminance?
According to Wikipedia, “Luminance is a photometric measure of the luminous intensity per unit area of light traveling in a given direction. It describes the amount of light that passes through, is emitted from, or is reflected from a particular area, and falls within a given solid angle.“
In photography, it’s mostly the light that is reflected from something (your scene) and (in case you photograph light sources like the sun or other lights), the light that is emitted. Either way, the lens you have attached to your camera will project that light onto your camera sensor that will then measure the luminance for every pixel in your scene. In reality, it will measure the illuminance though, because the light is bundled by the lens (and is, therefore “brighter” similar to a reading glass that will bundle sunlight to help you set your books on fire) but don’t let that confuse you.
The unit for luminance is candela (cd) per m2. Candela is Latin for candle, which also gives us a hint for the “brightness” of 1cd/m2. A common candle emits light with roughly 1 cd luminous intensity. This is very likely the reason why it is the base (0) of our exposure value scale. You sure have seen the candle in my graphic.
What might be a more familiar unit for some (but is in reality the same) is “nit”. That is often used to describe the brightness of e.g. smartphone screens, which btw. helps understand luminance a little better.
Consider photographing your smartphone. The higher the nits, the “brighter” the smartphone screen, and obviously the brighter the picture of your smartphone with given camera settings. The word brightness, however, is more the term for the subjective impression, while luminance is an objective photometric measure.
If you are a person who wants to know it all in the finest detail, let me recommend checking the formula of luminance, illuminance, and other stuff on Wikipedias luminance page.
How Does Scene Luminance Affect Exposure?
When photographers talk about exposure, they are merely talking about image brightness. Scene luminance is the base of image brightness, because as you have learned above, the scene can get darker pretty quick without you even realizing by how much.
The exposure value takes that influence into account. It represents any combination of a camera’s shutter speeds and aperture-numbers that create the same exposure at a given scene luminance.
So for example these two images, despite taken with totally different settings, create the same image brightness.

Camera settings: 1/125sec | f/16 | ISO200

Camera settings: 1/1000sec | f/5.6 | ISO200
Both have the same Exposure Value of 14EV, which represents the scene luminance at full sun – but not at noon.
Exposure thereby of course only refers to the brightness of the image, not to the look (which can be different in regard to depth of focus, etc.).
Read more about exposure value on wikipedia.
Scene luminance FAQ
Here is a list about the most frequently asked questions regarding the Scene Luminance.
If you have a question, feel free to ask below and I will add it to the list.
Yes, with a light meter you can measure luminance and with it scene Luminance. Some light meters can be set to output EV, others will only output the correct camera settings to create a well exposed image. Usually when using a light meter you would meter the light the scene is hit by, rather than scene luminance. This would give you a better reading.
Cameras have built-in light meters that measures scene luminance and set aperture, shutter speed and ISO accordingly. Unfortunately it will only measure the average brightness of the scene and try to convert it to medium grey. More on that in one of my Youtube videos "How to photograph a snowy landscape".
Please comment below. I will constantly update this section with new questions.


These images were all shot by me. My name is Wolf Amri, I’m a professional photographer and film maker.
On my youtube channel, I explain not only exposure, but everything else you need to know about photography. Explaining in a video is much easier than written because I can show you images, animations and examples on the way. So let me recommend watching my youtube beginner photography course.